
Have you wondered what you can do with the Wallet app on your iPhone? Although it was first called Passbook, Apple soon realized that the only sensible name was Wallet. That’s because it stores digital versions of roughly the same sort of things you might put in a physical wallet: credit and debit cards, store cards, membership cards, and even cash (well, Apple Pay Cash, anyway).
 Nearly all airlines can put your boarding passes in Wallet, too, and if you buy something like a concert ticket online, you may be able to add it to Wallet by tapping the “Add to Apple Wallet” button in the confirmation page or email. Having a boarding pass or ticket, which Apple calls a pass, in Wallet makes it easy to scan for a gate attendant.
Here’s how to use cards and passes in Wallet.
Display Your Cards and Passes
The main Wallet screen shows your cards and passes in a scrollable list, with credit/debit cards at the top. (If you’ve set up Apple Pay Cash, it’s treated as a debit card.)
To view more details about a card or pass, tap it.
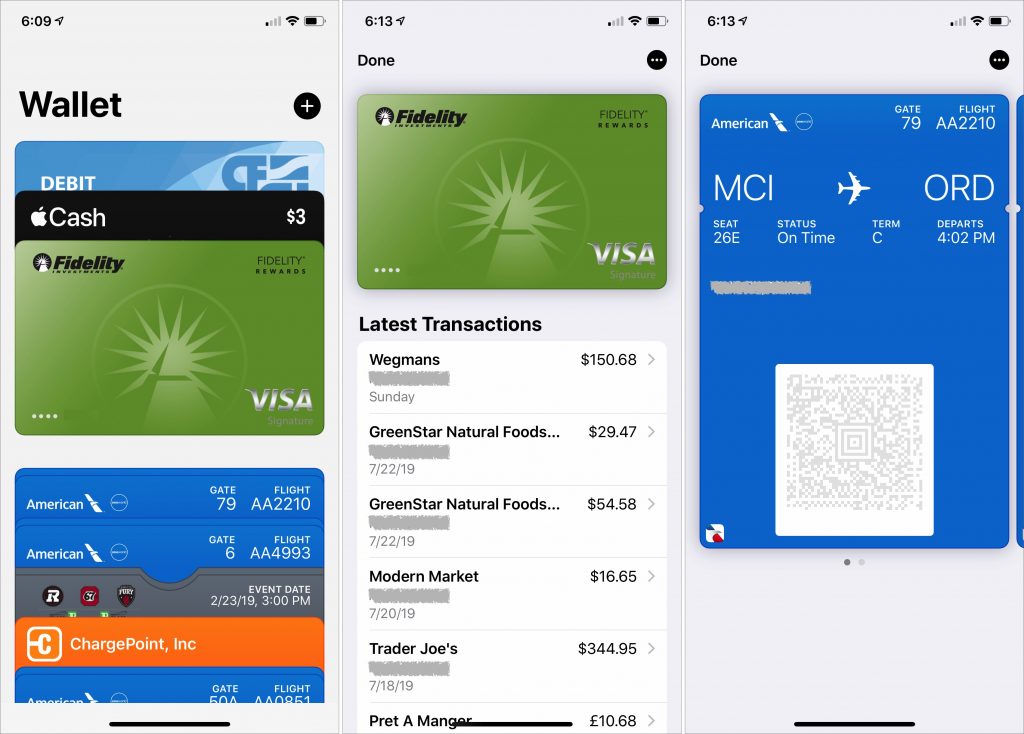
In the case of a credit/debit card, you see the face of the card and a list of its recent Apple Pay transactions.
For boarding passes for multi-flight trips, you see a single pass in the main list, but after you tap it, you can swipe horizontally to display the pass for each leg of the trip.
Membership cards, such as the ChargePoint card, may work like credit/debit cards in that you need to hold them near a reader to sign in.
In each case, to access settings related to the card or pass, tap the black ••• button at the upper right.
Adding and Using Credit and Debit Cards
Adding a credit/debit card so it can work with Apple Pay starts with tapping the black + button at the upper right of the Wallet screen. From there, follow the prompts—you can scan your card with the camera instead of keying in the data.
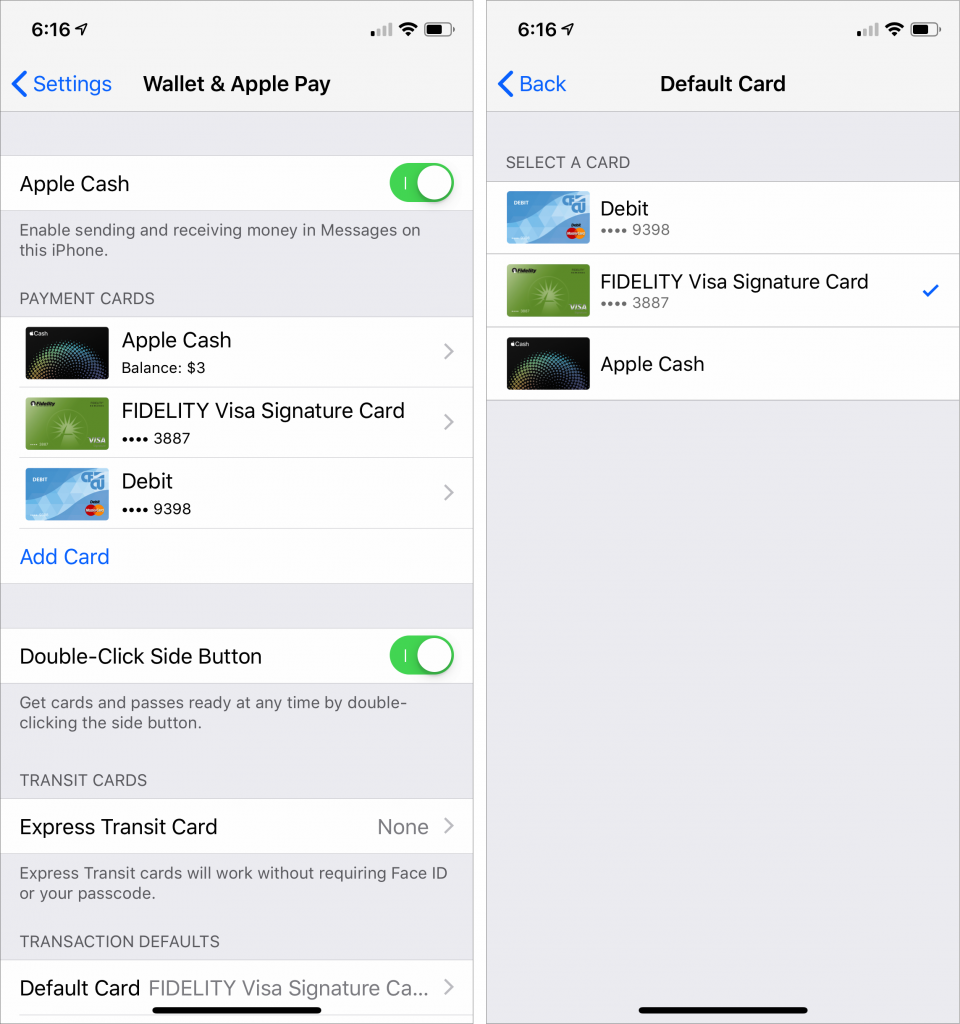
If you add more than one card, you’ll want to specify which should be the default for Apple Pay. Go to Settings > Wallet & Apple Pay. Scroll down to Transaction Defaults, and tap Default Card. Tap the desired card. In Wallet, the default card appears with its full face showing, below your other credit/debit cards.
To pay for a purchase with a stored credit/debit card at a payment terminal, put your iPhone right next to the terminal. The iPhone may automatically prompt you to authenticate Apple Pay, but if not, double-click the Home button or, with the iPhone X, XR, XS, or XS Max, double-click the side button. Wallet displays your default card. To authenticate, rest your finger on the Home button or, with the iPhone X models, authenticate with Face ID. To use a non-default card, tap the card pile at the bottom of the screen and then tap the desired card.
Adding and Using Airplane Boarding Passes and Event Tickets
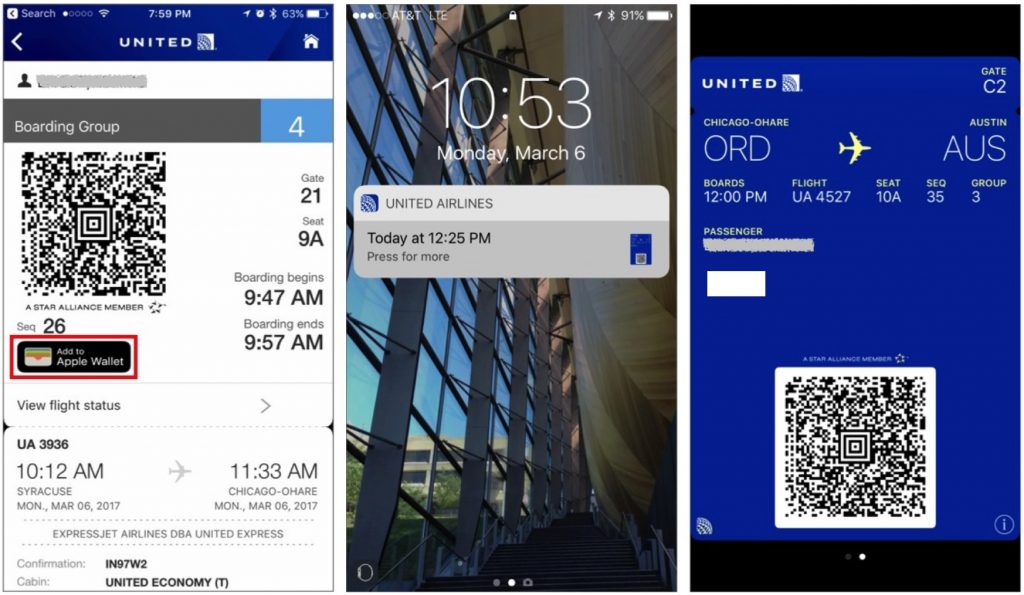
For flights, when you check in and get boarding passes using the airline’s iPhone app, you’ll be given the opportunity to tap an Add to Apple Wallet button. Do that and the boarding pass appears in Wallet, which will also display a notification for it on the Lock screen in the hours before your flight. When you need to show the boarding pass to security or the gate attendant, tap that notification to display the boarding pass with its QR code.
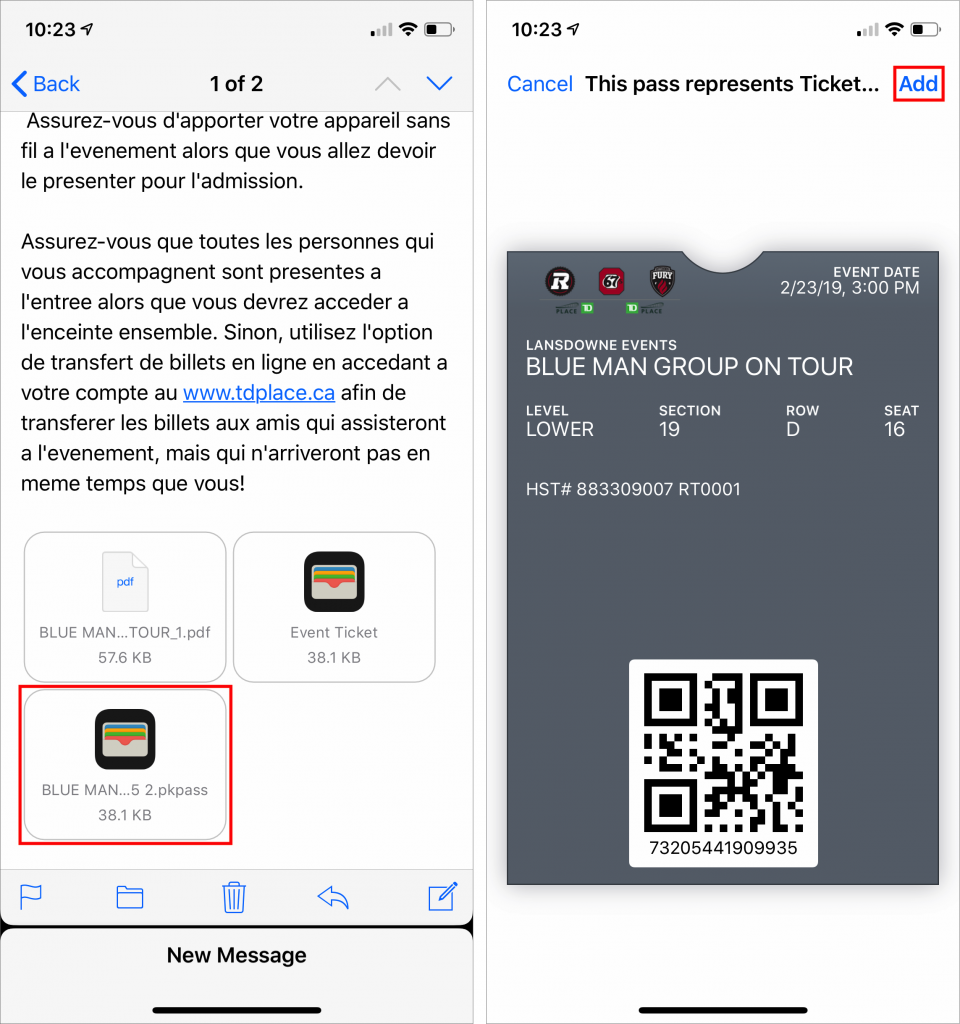
For events, the ticket-seller may display the Add to Apple Wallet button on the confirmation page of the checkout process or attach the tickets to your email receipt. In the latter case, open the message in Mail and tap the attachment to open it, and then tap Add to put it into Wallet. Later, when you arrive at the venue, open Wallet and display the ticket—again with a QR code—to gain entry.
Deleting Cards and Passes
Although you may want to keep some digital tickets for nostalgic reasons, it’s best to clean out old items:
- To delete a credit/debit card, tap the card to view it and then tap the black ••• button. Scroll down and tap Remove This Card.
- To remove a pass, go to the bottom of the main Wallet screen and tap Edit Passes. Tap the red delete button for that item, tap the next Delete or Delete All button, and then tap Done at the upper right.

Using Wallet makes it easier to keep your physical wallet slimmer. It can take a few minutes to add your cards and passes initially, but it’s worth the effort.
Thanks for checking out the MacEdge blog.
(Featured image by Two Paddles Axe and Leatherwork on Unsplash)
Social Media: Want to reduce the thickness of your wallet? Try offloading some cards to the Wallet app on your iPhone! Here are the basics: