
Complaining about getting too much email is like complaining about bad traffic—we brought it upon ourselves, and while it’s impossible to escape entirely, it’s worth knowing how to reduce it. Apple is fully cognizant of the issue, too, and has built features into the last couple versions of Mail—on the Mac, iPhone, and iPad—to help out. Here are three that you might find useful in different situations: mute, block, and unsubscribe.
Mute
It’s a huge email conversation about the annual holiday party at work, but you can’t go, and more people keep weighing in. However, since it’s just a ton of addresses on the Cc line, there’s no way to remove yourself, even though you don’t need to be notified of all the back-and-forth.
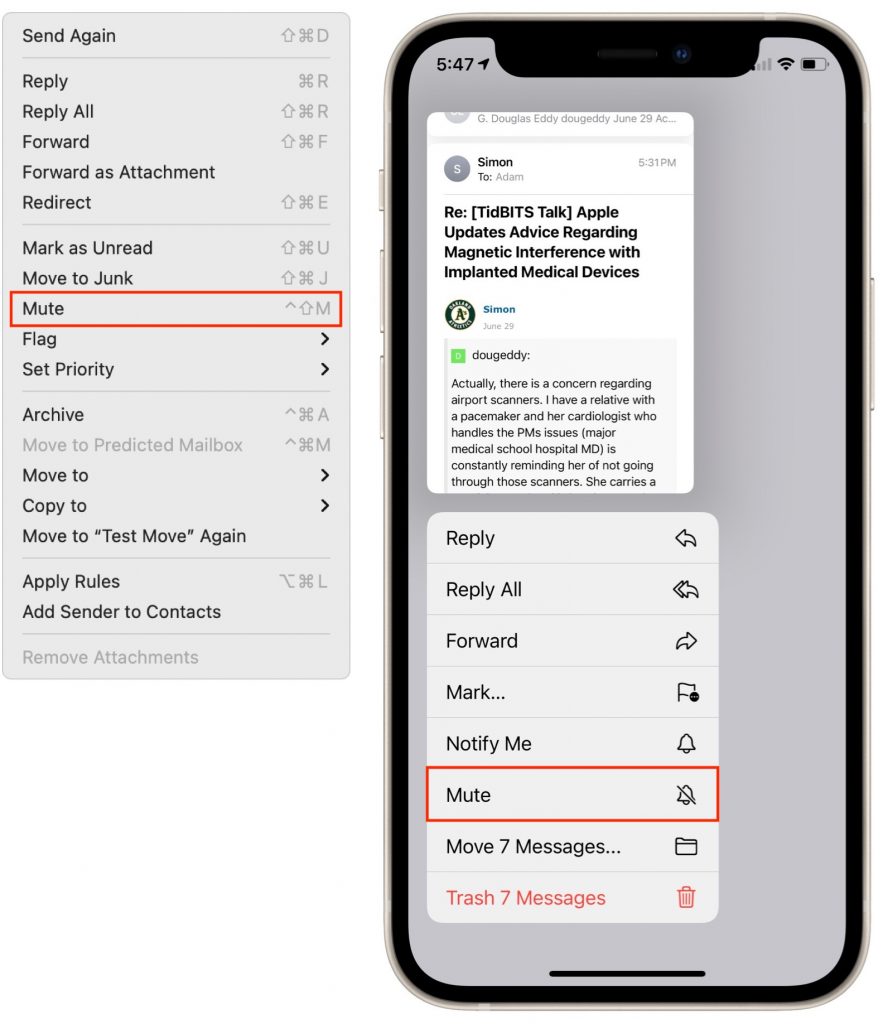
To help you quiet a too-chatty conversation, Apple added the Mute feature to Mail. On the Mac, select the conversation and choose Message > Mute or click the Mute button in the toolbar. On an iPhone or iPad, touch and hold the message until you get a popover, then tap Mute. You can also swipe left on the message, tap More, and tap Mute.
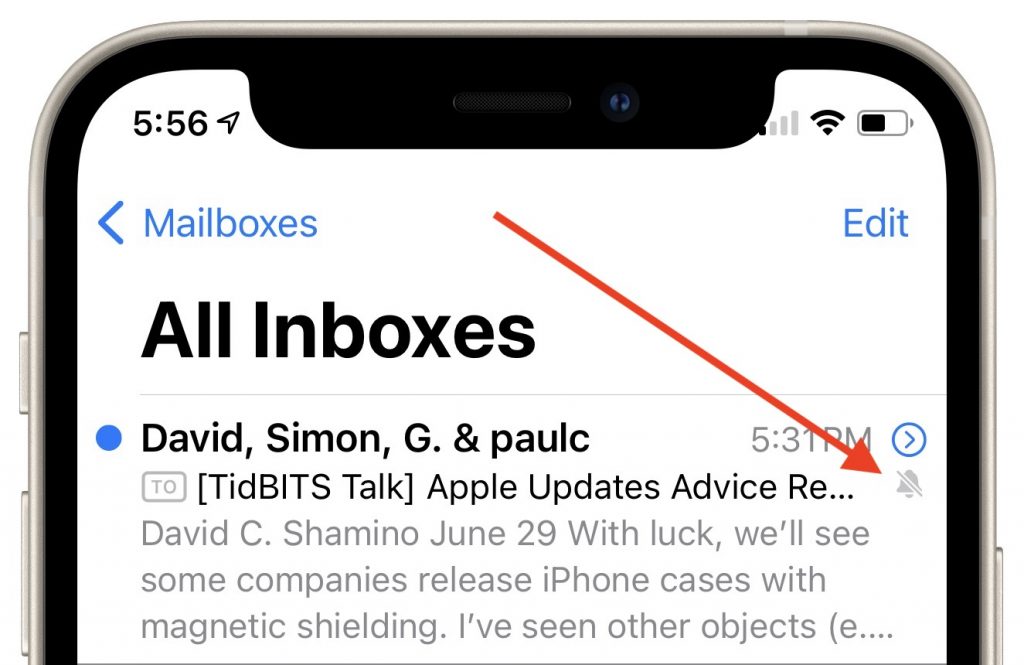
Messages will continue to flow in, but if you normally get notifications of Mail messages, you won’t get notifications for the muted conversation. In Mail, a little bell icon with a slash through it reminds you that the conversation is muted. To unmute a conversation, repeat these steps, but pick Unmute instead.
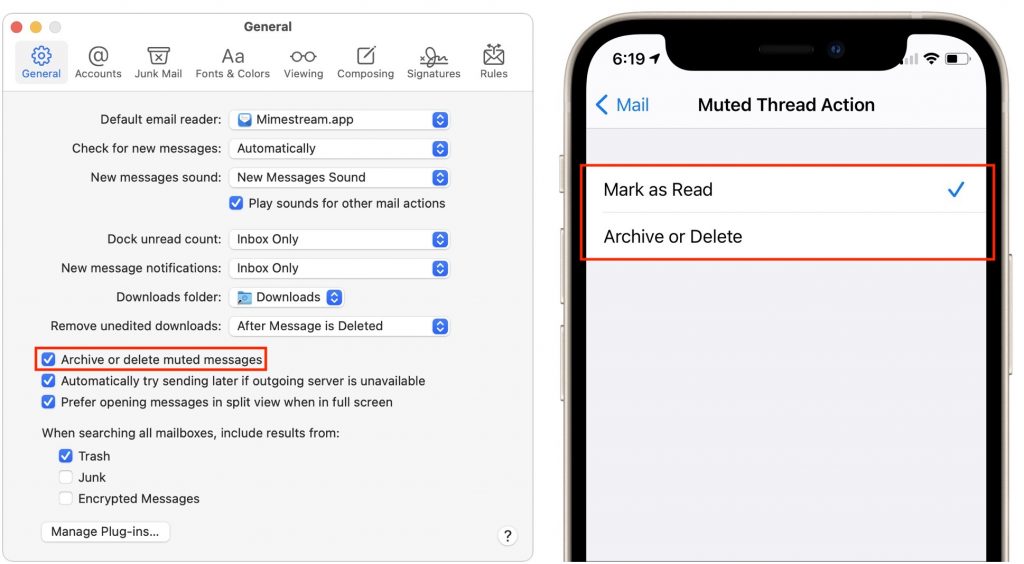
Do you never want to see those muted messages at all? You can discard them automatically. On the Mac, in Mail > Preferences > General, select “Archive or delete muted messages.” In iOS and iPadOS, go to Settings > Mail > Muted Thread Action, where you can choose between Mark as Read and Archive or Delete.
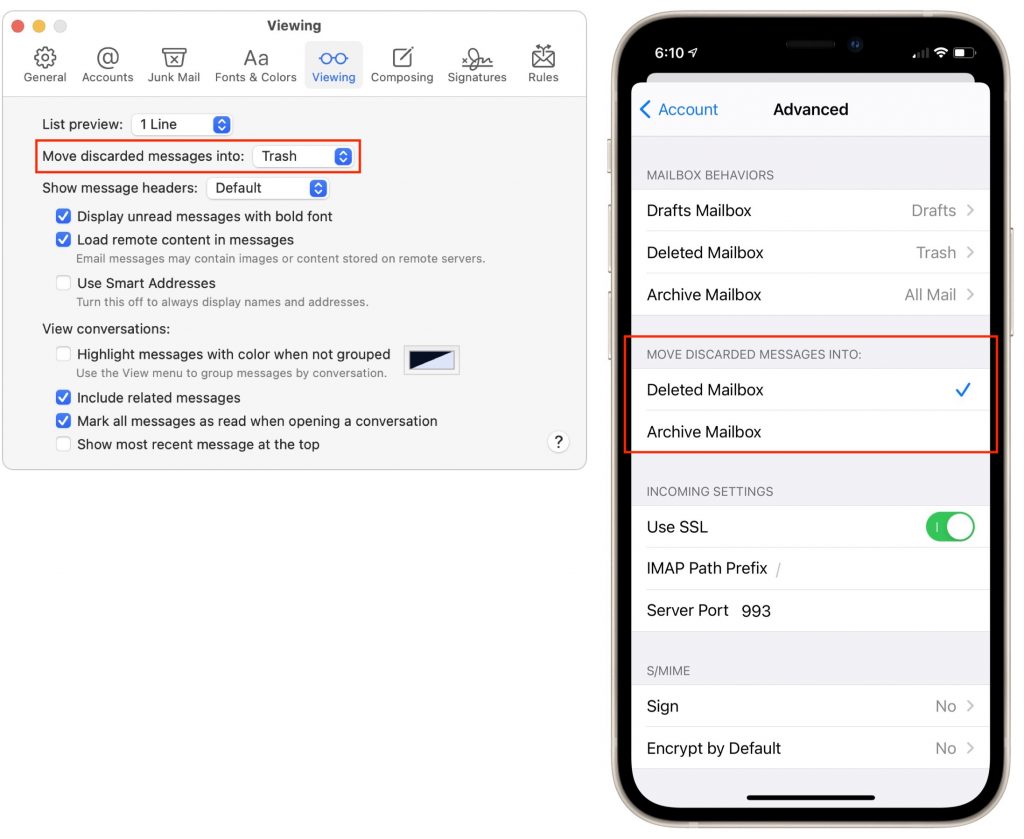
The “archive or delete” wording may seem confusing, but Apple lets you choose whether “discarding” a message archives it (removes it from your Inbox) or deletes it (moves it to the Trash mailbox). On the Mac, look for that setting in Mail > Preferences > Viewing > Move Discarded Messages Into. In iOS and iPadOS, it’s a per-account option in Settings > Mail > Accounts > accountName > Account > Advanced, under Move Discarded Messages Into.
Block
Muting is about conversations, not people. But what if you never want to see email from a particular person ever again? Perhaps it’s an angry ex-housemate, your embezzling ex-business partner, or someone who just won’t stop forwarding politically offensive memes. For such people, Apple provides blocking.
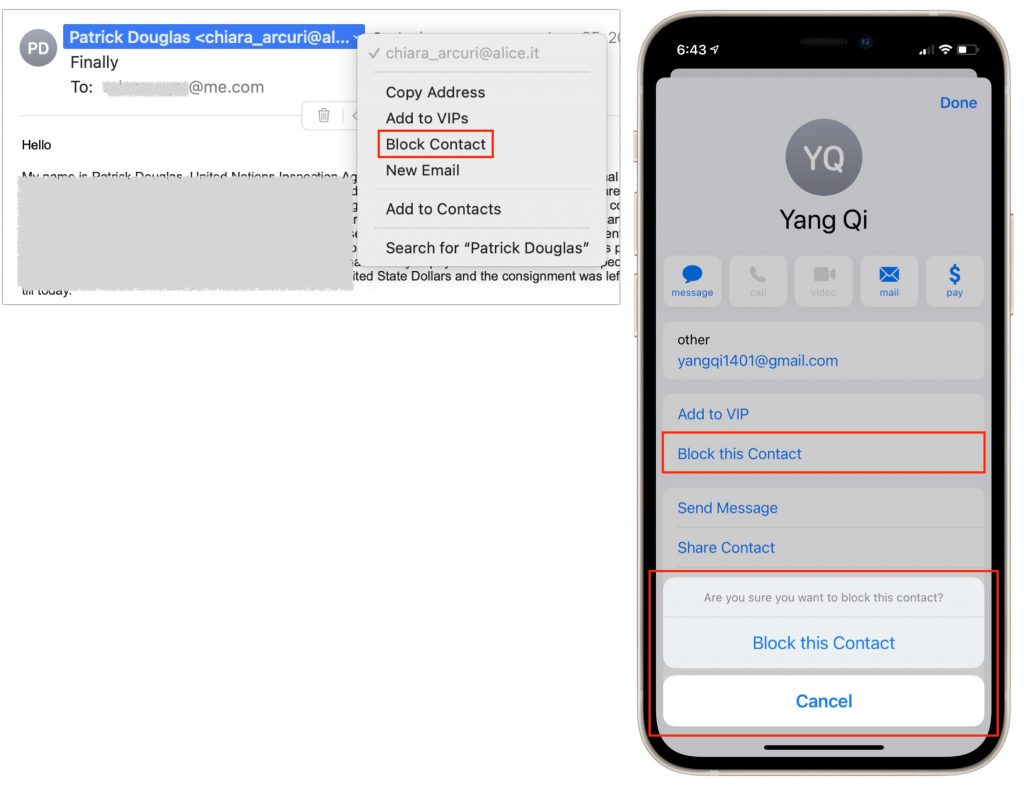
On the Mac, open a message from the offending person, hover the pointer over their name, click the down-pointing arrow, and choose Block Contact. In iOS and iPadOS, tap the person’s name so it turns into a blue link, tap it again to reveal their contact card, tap Block this Contact, and confirm your decision. Should you change your mind, repeat the steps and choose Unblock.
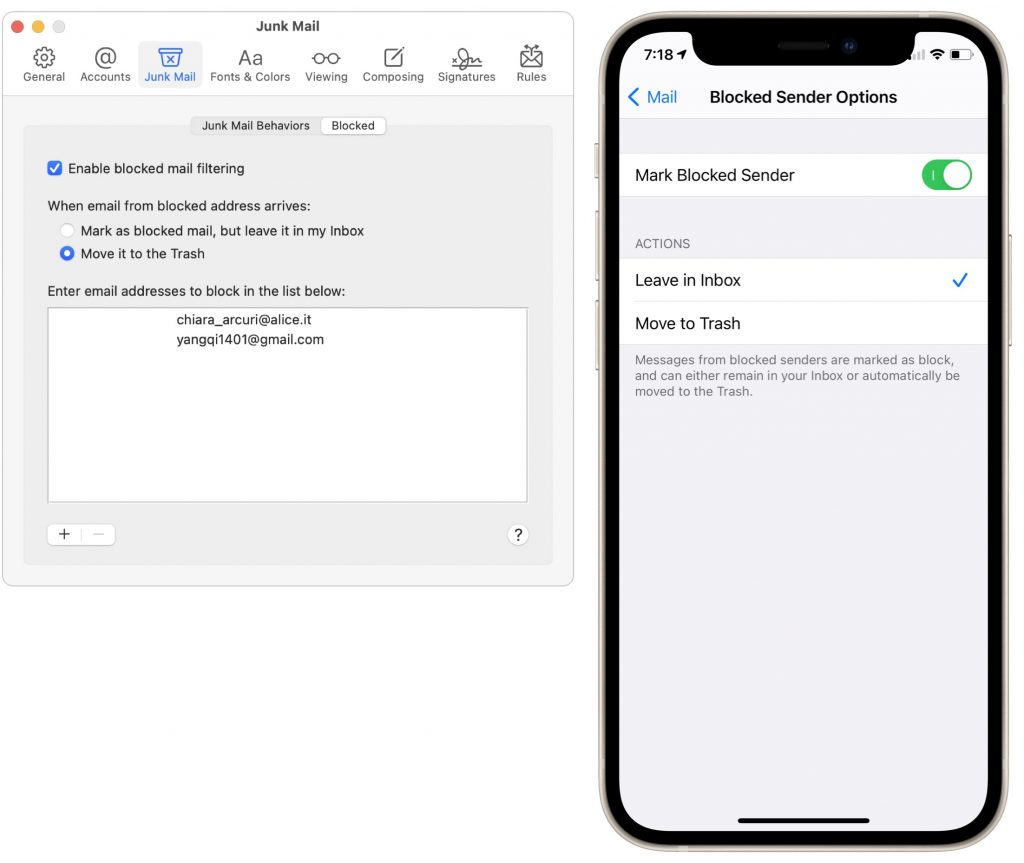
All that changes immediately is that Mail puts a banner at the top of the message that says “This message is from a blocked sender.” However, Mail also provides a button or link to preferences that offer more options. On the Mac, they’re in Mail > Preferences > Junk Mail > Blocked. In iOS and iPadOS, you’ll find them in Settings > Mail > Blocked Sender Options. You can choose between leaving blocked mail in your Inbox or moving it to the trash.
Note that we used spam senders as examples here, but for actual spam, you should instead use the Move to Junk command to mark it as spam and train Mail’s junk mail filter. Blocking is useful only for actual people, and it works only on specific email addresses, so if someone can send from another address, Mail won’t know to block that address until you block it too.
Unsubscribe
It’s all too easy to end up on a bazillion mailing lists these days. That may not be a problem if you find the messages useful and infrequent enough so as not to be annoying. But if you order something online and immediately start receiving two email blasts per week advertising new products, you don’t have to sit there and suffer.
What you shouldn’t do, however, is use the Move to Junk command to mark those messages as spam. If you have a legitimate business relationship with the organization, they’re not doing anything illegal by sending you email, and marking their messages as spam might mistrain Mail’s spam filter to catch related mail you do want. It will also hurt their deliverability rate unnecessarily, and while that’s not your problem, there is a better way.
Whenever Mail detects that a message is from a mailing list, it displays a banner saying so, along with an Unsubscribe link. Click or tap it, confirm your decision, and Mail sends an unsubscribe message from you to the mailing list server.

Alas, between mailing lists not providing the necessary details and Mail not being able to understand everything, this feature is a little weak. When it works, it’s great, but just because an Unsubscribe banner doesn’t appear doesn’t mean you can’t unsubscribe.
Whenever that happens, scroll to the bottom of the message and look for an Unsubscribe link. Click it to visit a website where you can sign off. Alas, as shown below, commercial mail from Apple itself seems to be exempt from Mail’s Unsubscribe banner, and the company has one of the less obvious Unsubscribe links out there.

As helpful as muting and blocking can be, you’ll get the biggest bang for your buck from unsubscribing from mailing lists. Remember, you can always find those companies on the Web should you wish to interact with them again.
Thanks for reading the MacEdge blog.
(Featured image by Brett Jordan on Unsplash)