
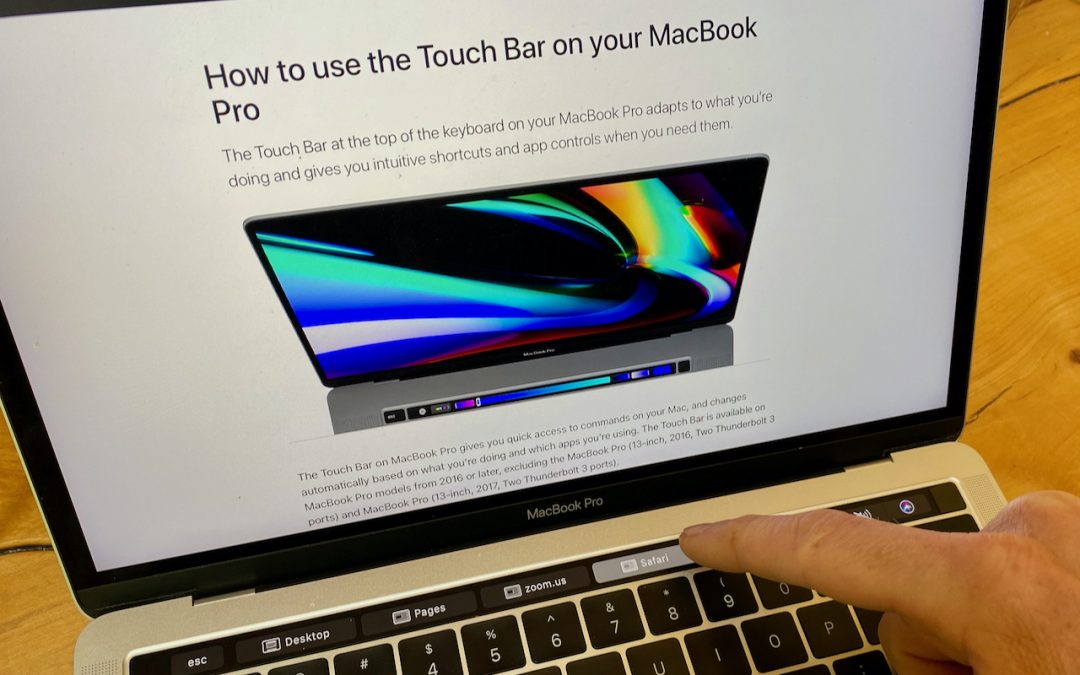
In 2016, Apple introduced the Touch Bar with the MacBook Pro. It’s a long, thin display above the number keys on the keyboard that shows a variety of buttons and controls. By default, it changes depending on which app you’re in, and it also displays the Control Strip, a collection of controls that roughly mimics the functions accessible from the F-keys that traditionally live in that position. Finally, it includes the Touch ID sensor that brings fingerprint authentication to the Mac.
Since its launch, however, the Touch Bar hasn’t migrated to any other Macs or keyboards, although the MacBook Air picked up a Touch ID sensor without the rest of the Touch Bar. As a result, developers haven’t been as enthusiastic about supporting the Touch Bar as they might have been. Nevertheless, it provides useful shortcuts in many apps, and you can customize it more to your liking. (Plus, although we’re not going into those details here, Apple is making the Touch Bar even more useful and customizable in macOS 11 Big Sur.)
Choose What the Touch Bar Shows
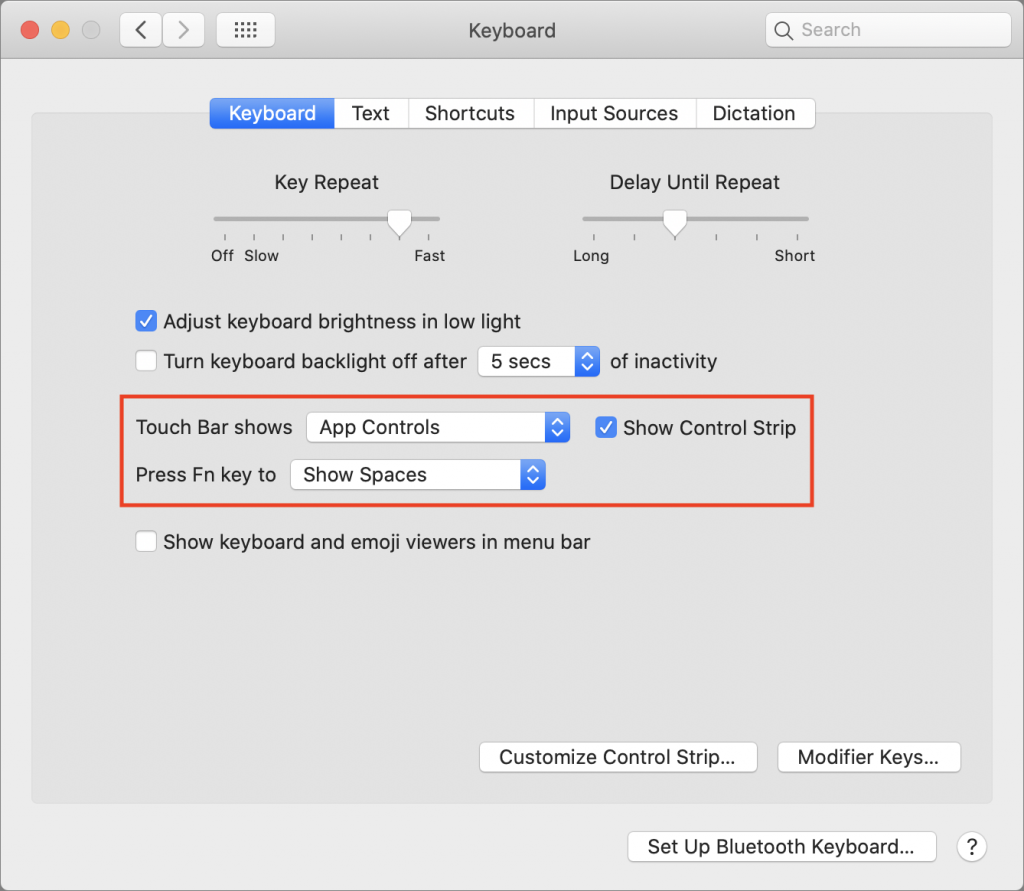
You may never have noticed the Touch Bar’s settings because Apple has hidden them in the Keyboard pane of System Preferences. Logical, but perhaps not where you might have looked first if you were thinking of the Touch Bar as an extension of the trackpad.
You have two choices here, what appears in the Touch Bar normally, and how it changes if you press the Fn key in the lower-left corner of the keyboard. Your options include:
- App Controls: The controls that appear when you choose this option vary by app. This option is the most generally useful, though how much so depends on whether the apps you use support the Touch Bar in helpful ways.
- Expanded Control Strip: The Control Strip, which appears by default on the right side of the Touch Bar, lets you adjust common settings like brightness and volume. The Expanded Control Strip option fills the rest of the Touch Bar with more buttons.
- F1, F2, etc. Keys: Aimed at keyboard traditionalists, this option mimics the F-keys that occupy the Touch Bar’s position on every other keyboard in the universe. People often use these keys as hot keys with macro programs like Keyboard Maestro.
- Quick Actions: Want to create your own custom buttons for the Touch Bar? In Apple’s Automator app, you can create workflows as Quick Actions, which then appear on the Touch Bar when you choose this option.
- Spaces: Those who are big users of Spaces in Mission Control might appreciate this option, which lets you switch between different full-screen apps and Split View spaces.
In the Touch Bar Shows pop-up menu, you should choose the set of Touch Bar buttons that you’ll find the most useful most of the time. That’s probably either App Controls or F-keys for most people, unless you do a lot of your own automation (choose Quick Actions) or regularly use full-screen apps (choose Spaces).
The Press Fn Key To menu basically gives you a second choice—press that key, and you can display whatever set of buttons you’d find next most useful.
Finally, notice that there’s a checkbox for Show Control Strip. If you want to take over its space on the right side of the Touch Bar for other buttons, deselect the checkbox. One useful approach is to disable the Control Strip in general use, but show the expanded Control Strip when you press Fn.
Customize App Controls
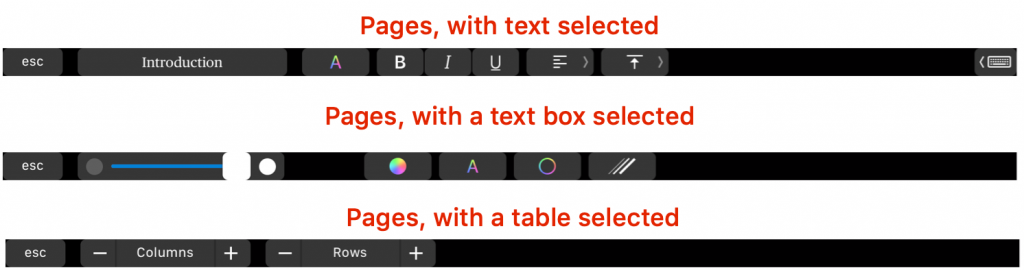
App controls are in many ways the most interesting because they change not just when you switch between apps, but also based on what you’re doing in an app. Take Pages, for instance. If you’re working with text, Pages configures the Touch Bar to show buttons that let you switch between paragraph styles, apply character formatting, and tweak horizontal and vertical justification. That button on the far right displays auto-complete options for the word you’re typing. But if you have a text box selected, Pages instead provides buttons for opacity, various colors, and line strokes. Select a table, and Pages immediately offers options for adding and removing columns and rows.
Even better, some apps, like Safari, let you pick which buttons appear in the Touch Bar, just as you can pick the controls that appear in window toolbars. In apps that allow this, choose View > Customize Touch Bar. A selection of available buttons appears at the bottom of the screen. Drag one of the buttons off the bottom of the screen and—really!—onto the Touch Bar, where you can drag it into different spots. When you’re done, click the Done button.
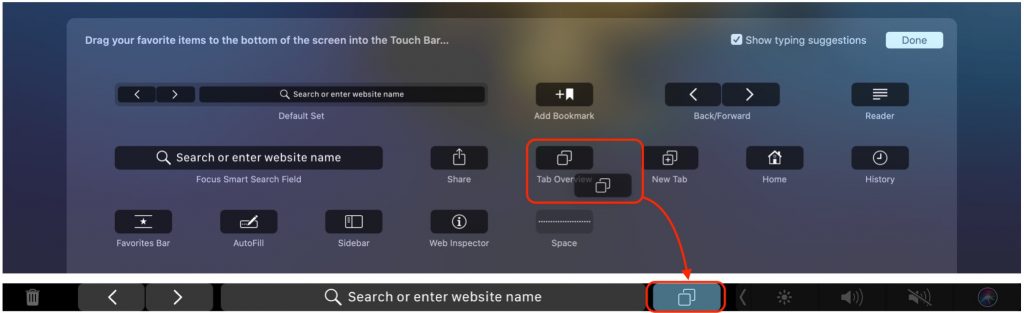
While you’re customizing the Touch Bar for an app, you can also rearrange buttons by dragging them left or right (with either the pointer or your finger) and remove buttons by dragging them (with the pointer) from the Touch Bar to the MacBook Pro’s screen.
Note that the Touch Bar is only so big, and the Mac won’t let you populate it with more buttons than it has room for. If you try, the new button will replace one of the current buttons.
Customize the Control Strip
You’re not limited to choosing which app controls you’d like to see in the Touch Bar. In System Preferences > Keyboard > Keyboard, click Customize Control Strip to bring up a similar collection of controls that you can add to the Control Strip. Plus, you can rearrange and remove buttons from the Touch Bar’s Control Strip just as with the app controls.

If you’ve been ignoring the Touch Bar because it didn’t work the way you wanted, or if you’ve liked using it but wished it could do more, give these customization options a try!
Thanks for checking out the MacEdge blog.
(Featured image by Adam Engst)